Back to the RDS Proxy main page ·| SSH targets: concepts
This page publishes a Linux server through the RDS Proxy and gives a policy access to it.
The example uses the policyad.articatech.net, which already exists, and the server192.168.1.190, an Artica appliance.
The same steps apply to any Linux server.
Before you start, check the requirements.
The concepts are explained in SSH targets: concepts.
¶ 1. Look at the bastion SSH key
Skip this step if the target uses a password.
Open RDS Proxy » Status.
The Bastion SSH key line holds the key pair the gateway uses to log in to SSH targets.
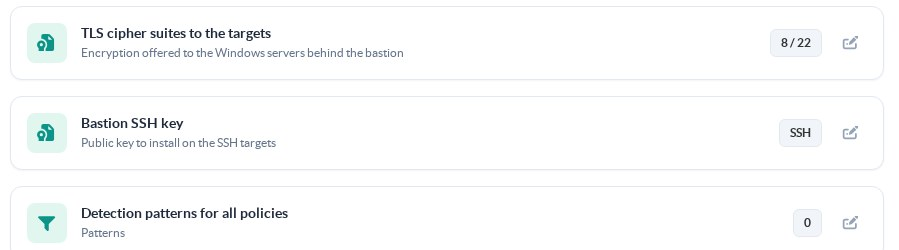
Click the line to display the key.
The window shows the key type, its fingerprint, its creation date and the public line.
Copy puts the public line in the clipboard, if you prefer to install it by hand in ~/.ssh/authorized_keys.
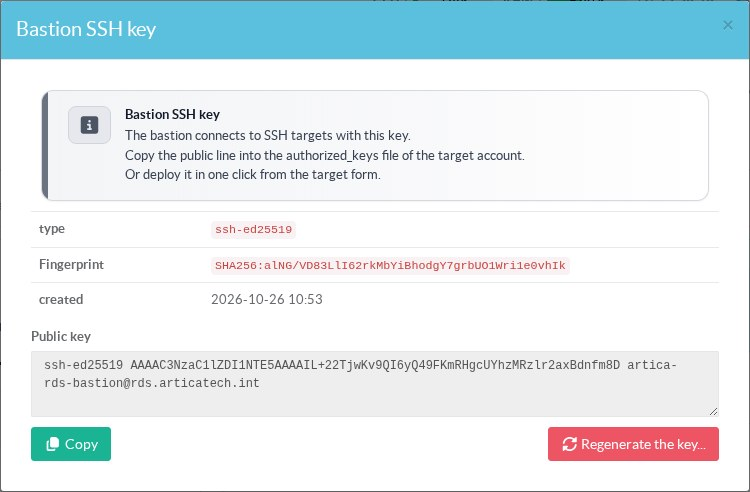
Regenerate the key creates a new pair.
Targets where the old key is installed stop working until the new key is deployed.
The window tells how many targets are affected.
¶ 2. Create the SSH target
Open RDS Proxy » Policies » Targets.
The SSH button filters the SSH targets.
Each SSH target shows its authentication mode and the fingerprint of its host key.
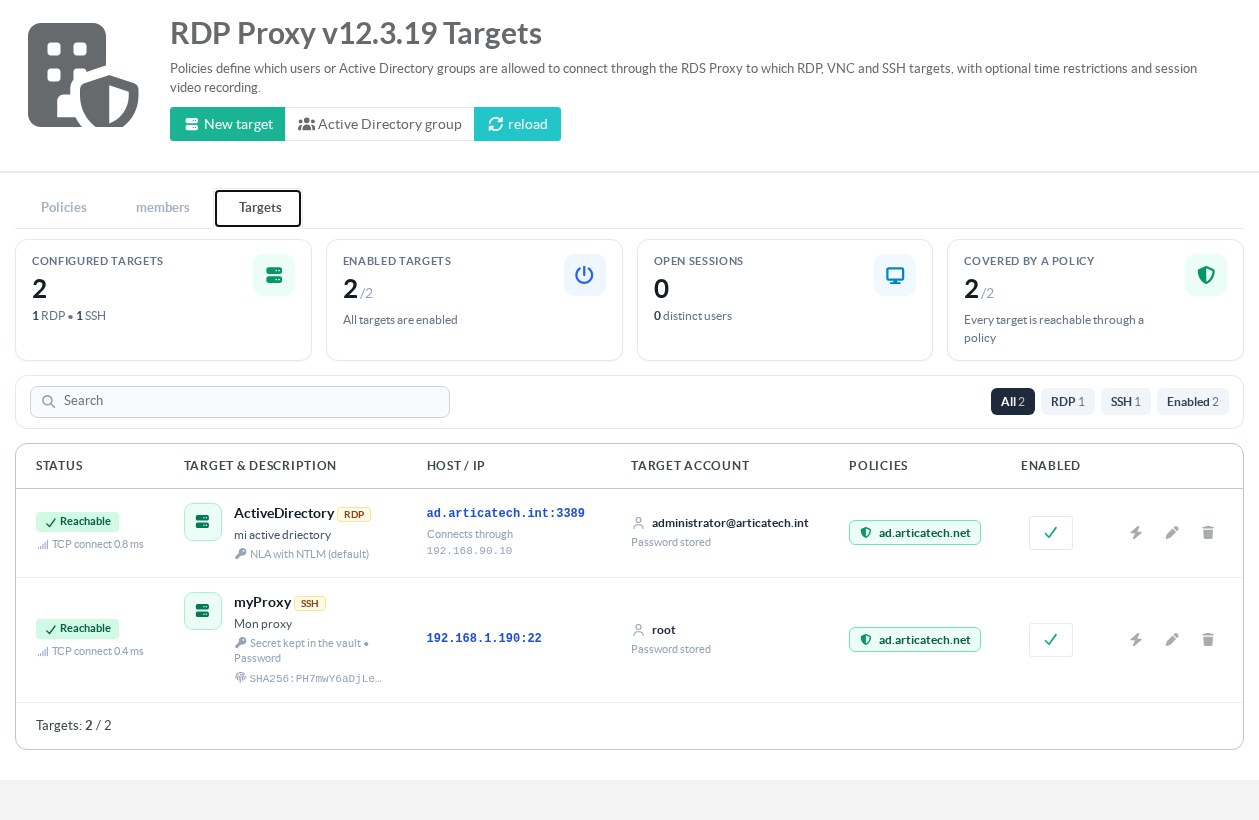
Click New target and choose SSH in Protocol.
The form hides the fields that only apply to RDP and sets the port to 22.
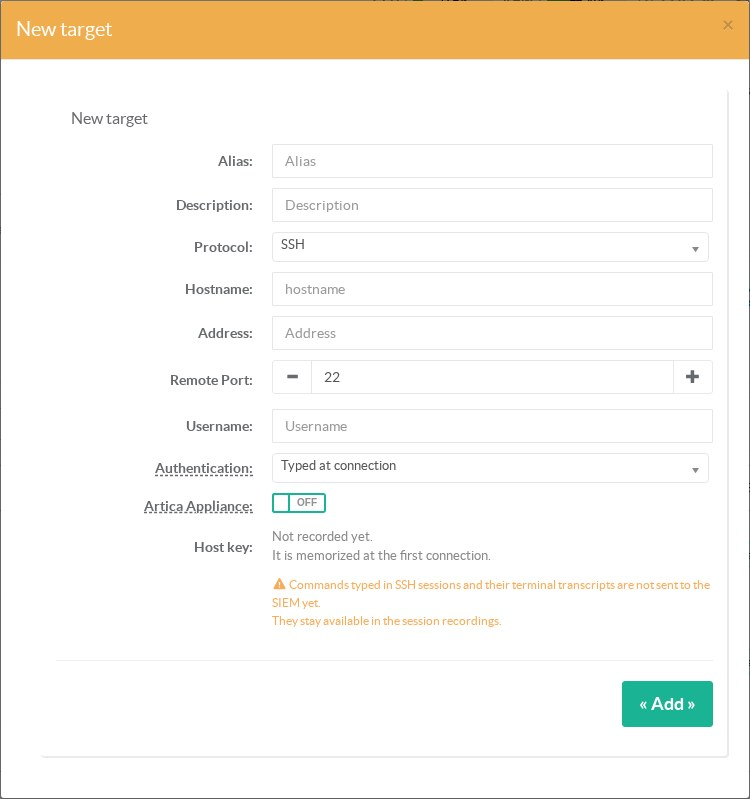
| Field | Meaning |
|---|---|
| Alias | The name users see in the list of servers. |
| Description | A description shown in the list of servers. |
| Protocol | SSH. |
| Hostname | The host name of the server. It only needs to resolve on the appliance. |
| Address | Optional IP address. When set, the gateway connects to this address. |
| Remote Port | The SSH port of the server, 22 by default. |
| Username | The Linux account used on the server. It is required with the vault. With Typed at connection, leave it empty to let the user type it. |
| Authentication | Typed at connection: the user types the password in the terminal. Secret kept in the vault: the gateway logs in with a secret the user never sees. |
| Secret Type | With the vault: Password, Private key (an unencrypted OpenSSH or PEM key) or Bastion key. |
| Artica Appliance | Turn it on when the server is an Artica appliance. The bastion key is then installed in the SSH keys the appliance manages. |
| Host key | Empty until the first connection. The gateway records the key of the server and shows its fingerprint and date. |
Click Add.
¶ A target in the vault
Here is the target myProxy after a first connection.
It logs in as root with a password kept in the vault.
The password field stays empty: a saved secret is never displayed.
Leave the field empty to keep it, or type a new one to replace it.
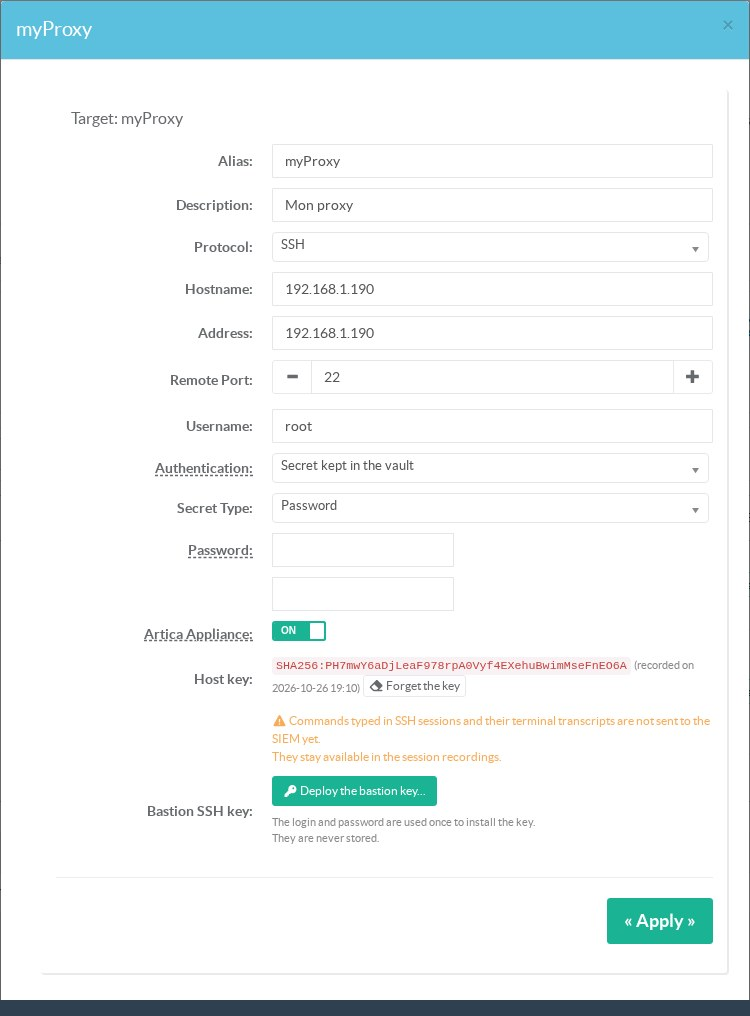
Forget the key clears the recorded host key.
Use it only when you know why the key of the server changed (reinstallation, new key).
The next connection records the new key.
¶ Deploy the bastion key
To switch the target to the bastion key, click Deploy the bastion key.
Type the account and its password once.
The gateway logs in with this password, installs the public key, then tests a connection with the key.
The target switches to Bastion key only when this test succeeds.
The password is not stored anywhere.
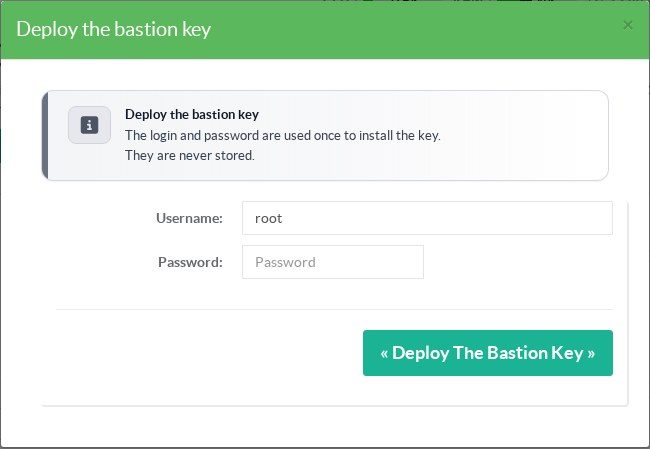
On a Linux server, the key is added once to ~/.ssh/authorized_keys.
The gateway creates ~/.ssh in mode 0700 and the file in mode 0600 when they are missing.
On an Artica appliance (option Artica Appliance), the key goes through the SSH key management of the appliance.
¶ 3. Link the target to the policy
Open RDS Proxy » Policies and open the policy ad.articatech.net.
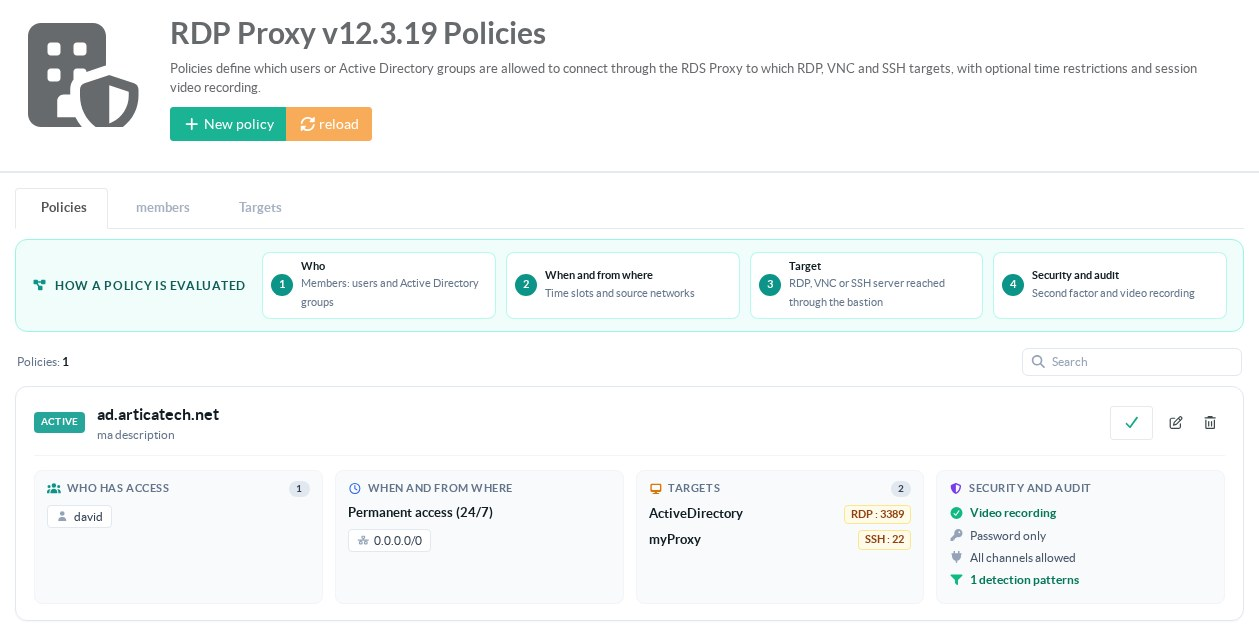
In the Targets tab, link the SSH target.
A policy can mix RDP, VNC and SSH targets.
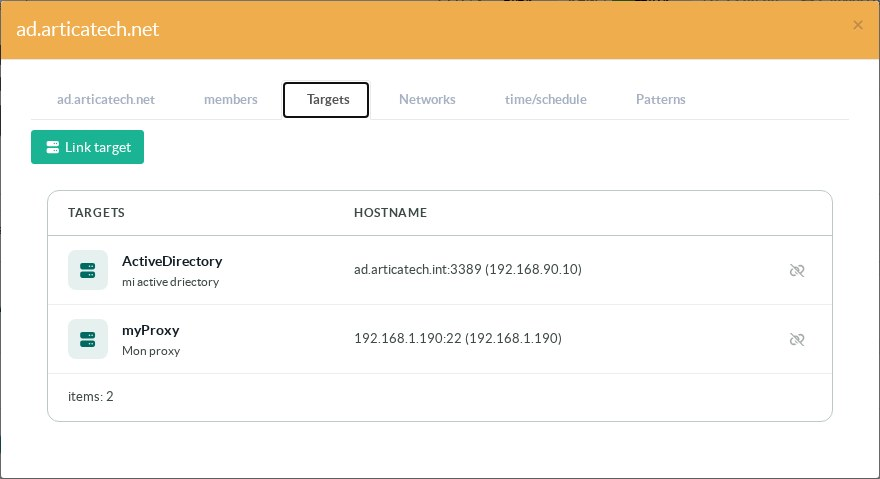
The members, networks and schedules of the policy apply to SSH targets as they are.
See RDS Proxy policies.
¶ 4. Set the session rights
The first tab of the policy holds its settings.
Two notes concern SSH targets.
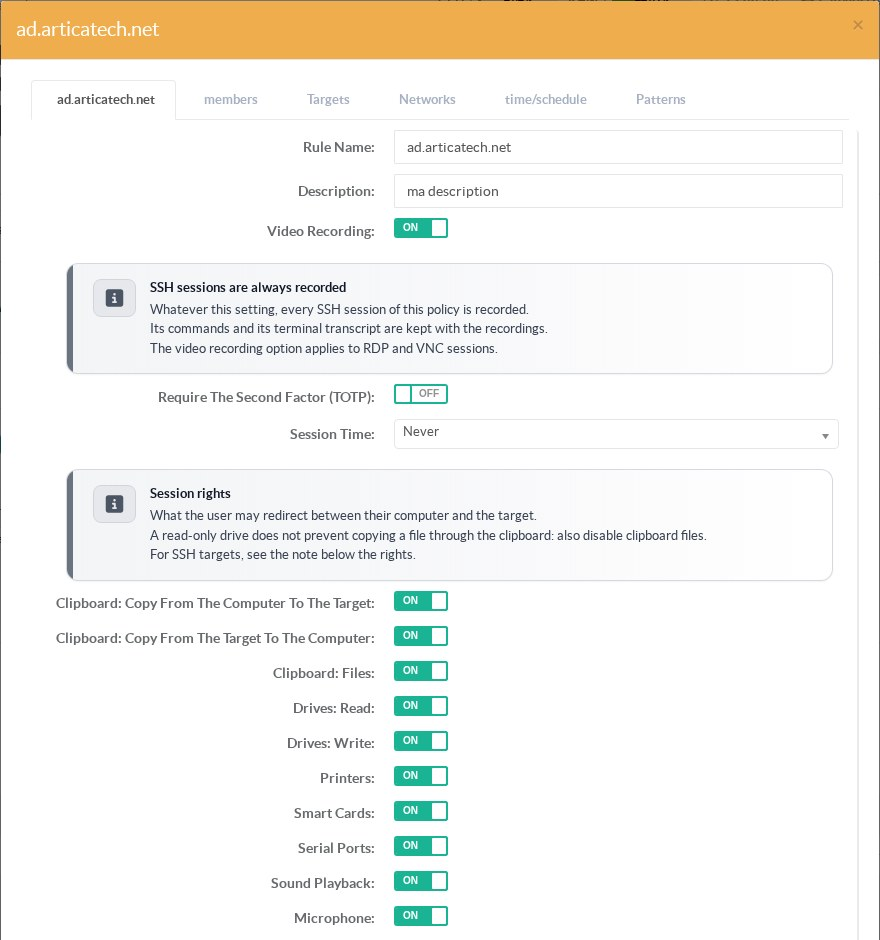
SSH sessions are always recorded.
The Video Recording option only applies to RDP and VNC sessions.
Only the three clipboard rights apply to SSH targets:
| Right | Effect on an SSH target |
|---|---|
| Clipboard: Copy From The Computer To The Target | Paste text in the terminal. With Clipboard: Files, paste files from Windows Explorer into the home directory. |
| Clipboard: Copy From The Target To The Computer | Copy text from the terminal. With Clipboard: Files, send server files to Windows with the Ctrl+Alt+F explorer. |
| Clipboard: Files | Allows file transfers in the directions allowed above. Without it, both directions are refused. |
The drives, printers, smart cards, serial ports and audio rights only apply to RDP targets.
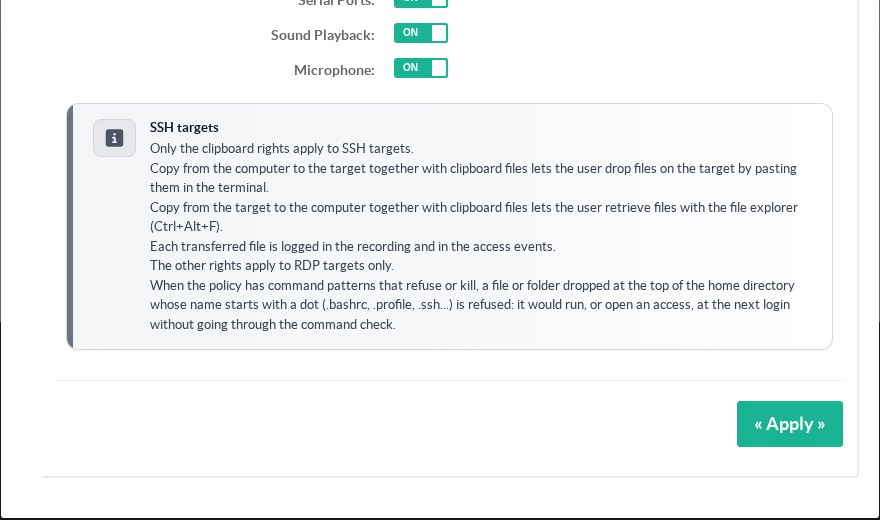
When the policy has command patterns that refuse or disconnect, a file or a folder whose name starts with a dot is refused at the top of the home directory.
A file such as .bashrc, .profile or .ssh/authorized_keys would run, or open an access, at the next login without going through the command check.
Click Apply.
¶ 5. Add command patterns
Open the Patterns tab of the policy and click New pattern.
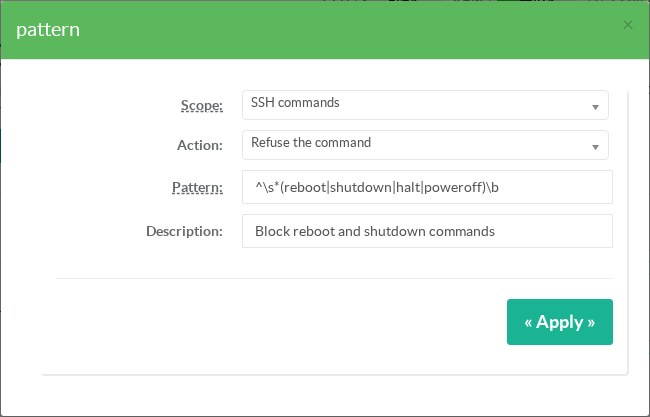
| Field | Value in the example |
|---|---|
| Scope | SSH commands. Window titles is for RDP sessions. |
| Action | Refuse the command. The other choices are Notify and Disconnect. |
| Pattern | ^\s*(reboot|shutdown|halt|poweroff)\b |
| Description | Block reboot and shutdown commands |
The pattern is a regular expression (Hyperscan syntax) applied to the command line.
Anchor it with ^ and use \s+ between words, so that extra spaces do not let a command through.
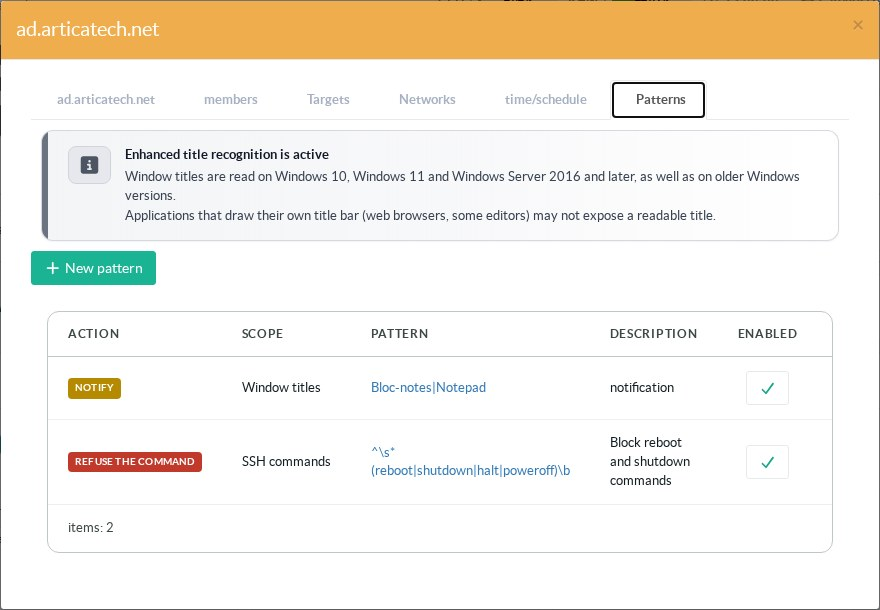
Patterns are read when a session opens.
A session already open keeps the patterns it started with.
¶ 6. Test
Connect with a member of the policy, as described in Connect and transfer files.
Then check the session in RDS Proxy » Sessions, and its trace in Videos.